
Creator's Corner: Block Printing
Posted by Flax and Anna Lark on 4th Aug 2015
Insider Block Printing Tips, Tricks and Techniques
FLAX's very own printmaking expert Anna Lark, is here to share her experience, knowledge and passion for the process. Read on and get inspired to carve!
Relief printing is printing from raised images. Block printing using wood or linoleum involves carving away material to create a printable image. Printmaking is an art that has been used since the fifth century or before and remains popular today. It allows for repetition of a single image.
Block printing is an intimate hands-on experience with materials that gives me the feeling of closeness to the work. I started block printing at a very young age, using linoleum and Styrofoam to make stamps and in college I rediscovered my love for the art. I love that mistakes can't simply be erased and knots and imperfections of a woodblock dictate the final look of the work of art.
During my years of printing, I have been given many tips that have dramatically helped me that I'm sharing with you here:
- Small linoleum blocks can be used as stamps and are easy to print with stamp pads.
- Linoleum blocks can be warmed up on a low heat hotplate to make them a bit easier to carve. This is an excellent trick if you are using tools that are a bit dull.
- Be sure to maintain your tools by sharpening and cleaning them as needed. Fine lines and repetition of specific mark-making is very important in block printing and you don't want to have to struggle with dull tools. Sharp tools are easier and safer to work with.
- Blender markers and laser printers can be your best friend when it comes to transferring your image onto a block. It's as simple as taking a laser print or a photo copy of your image, placing it face down on the block and using the blender marker on the back of the print to transfer the image. I use the AD Blender Marker by Chartpak. It's a little smelly, but it provides for a great transfer with sharp lines and no bleeding or feathering.
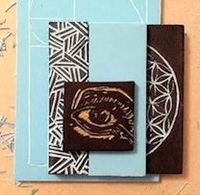
- Relief printing is all about playing with different marks to create light and dark areas on your block. I recommend making yourself a few sample blocks with different marks just to have a reference of what techniques you can use in your work (ie. make a block with 6 different marks that give you a light to dark gradient).
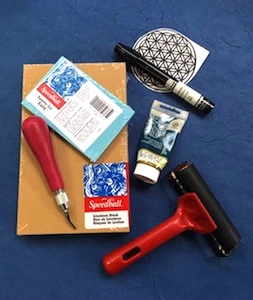
- Speedball makes tools that are good for soft woods and linoleum. If you are going to do more heavy duty carving on denser woods, it's worth investing in a more heavy duty set of tools.
- Use an X-Acto knife for itty bitty details if your carving tools just aren't making the cut. Speedball makes a very
 small v-gauge for carving but sometimes to get a super fine line, using an X-Acto to cut the line can allow more precision.
- If you are doing a woodcut, I recommend using a lightweight wood, such as shina. You should always cut with the grain of the wood to avoid splintering so keep this in mind when transferring your image onto the block.
- You can use almost any wood, even something found on the street. Just sand it down and give it a shot! Plywood and harder woods, like cherry, require much sharper tools than linoleum blocks.
- If you don't have access to a press, hand printing with thinner papers (kozo, mulberry, lightweight cardstocks, etc.) provides equally pleasing results.
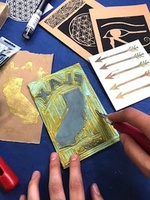
- After inking your block, apply the paper and burnish the entire surface area to transfer the ink from the block to the paper. I sometimes use a wooden spoon I made as my burnisher due to its smooth, rounded surface. You can also use the palm of your hand. The little imperfections that may occur during hand printing often give your print its own unique character. I love printing by hand. It makes me feel as though I am truly honoring the history of printmaking, a timeless craft.
Happy Printing!
Check out Anna's work HERE!
Shop our Printmaking Supplies